Photoshop制作黄金字体效果
时间:2014-04-22 06:58:38来源:网络整理
教程的字体效果虽然有浮雕效果,不过不用用图层样式来完成。而是用光照滤镜和曲线打造的。制作的时候先做出黑白效果,后期再调色即可。
领航软件教程推荐:photoshop7.0迷你版免费下载 | Photoshop CS5 中文免费下载 | photoshop免费下载 查看更多PS教程
最终效果

1、新建一个文件,注意一定要是RGB模式的。
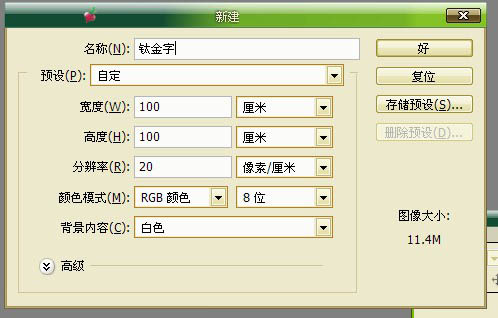
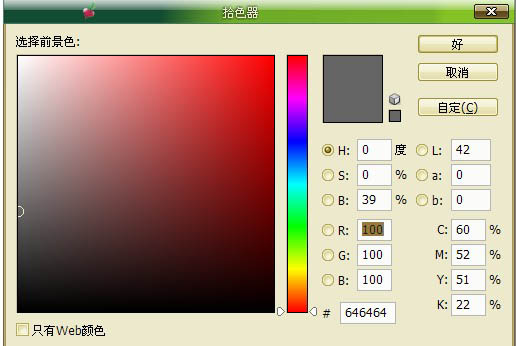
2、将前景色调为灰色:R100,G100,B100。
3、打上喜欢的文字。
4、删格化文字。
5、按住Ctrl建点文字层,选择-存储选区。这里我命名为“金”。
6、点通道,选取刚才存储的选区“金”。

本类热门